Search Results
78 results found with an empty search
- Chewy Gingerbread Cookies
Chewy Gingerbread Cookies I know Christmas is over; however, if you have some leftover candy canes or holiday baking staples left over, you can give this gingerbread cookie recipe a try! These Chewbecca cookies are soft and chewy, and would serve as a perfect compliment for a binge watch of Season 2 of The Mandalorian! I used this cookie cutter off of Etsy for the cookie shape, and the fondant decorations are incredibly easy to put together! Servings: 24 Cookies Prep Time: 1 Hour Total Time: 4 Hours Ingredients 1 cup unsalted butter, room temperature 1 egg, room temperature 1/2 cup dark brown sugar 1/2 cup light brown sugar 1/2 cup molasses 3 + 1/2 cups all-purpose flour 1 teaspoon salt 1/4 teaspoon baking soda 2 teaspoons ground ginger 1 teaspoon ground cinnamon 1/2 teaspoon ground nutmeg Black fondant White fondant White royal icing Mini candy canes Sugar pearls Instructions In a medium-sized bowl, whisk together the flour, salt, baking soda, ginger, cinnamon, and nutmeg. Set aside. In a large bowl, beat together the butter and brown sugars until smooth and creamy (2-5 minutes). Beat in the molasses and then beat in the egg, both until the batter is just combined. Add the flour mixture to the wet ingredients and mix until just combined. Chill the gingerbread dough in the fridge for at least one hour. The best practice is to combine it into a disk and then place it into the fridge covered in plastic wrap. I made two discs and chilled the dough for one hour. It makes rolling out the dough much easier. While the dough is chilling, roll out black and white fondant. Cut out ~48 large black circles for the eyes, ~12 black circles for the noses, ~48 medium sized white circles for the eyes, ~48 small white circles for the eyes, and ~12 small white circles for the teeth. Cut out 48 small ropes of black fondant to assemble the mouth, and 24 large and thick strips from the black fondant for the bullet vest. On each of the large black circles, place one medium sized white circle and one small white circle. Prep the bottom side of each circle with some water to make sure the fondant sticks. Cut the 12 circles for both the nose and the teeth in half and shape into triangles. Press the sugar pearls into the strips of black fondant to create the bullet vest. Place all of the fondant pieces onto a cookie sheet lined with wax paper and allow to chill while you prep the cookies. Roll the cookie dough out onto cookie sheets lined with silicone. I've found this is the easiest way to make sure the cookies don't lose their shapes as you don't have to worry about transferring them after you cut them out! Press a cookie cutter into the dough until you have 6-8 cookies on each sheet. Remove the excess dough. You can roll it into a ball and re-roll it out to use for additional cookies later. If you would like the gingerbread cookies to be holding a candy cane (or a mini Porg!), then slightly cut out the arms so that they are more mobile. Ball up a piece of aluminum foil and fold the arm on top of the ball, rolling until the aluminum foil ball (but not the dough) rests on the cookie's chest. Allow the dough to chill after being cut out for at least 2 more hours. Pre-heat oven to 350°. Bake the cookies for 12 minutes or until brown and holding their shape. Allow to cool 5 minutes on the pan and then transfer to a cookie rack to cool completely. If you baked with the aluminum foil balls, carefully remove them. If the arms break, seal them back on with royal icing. Use royal icing to press on the cookie's eyes, nose, mouth, and tooth. If you use candy canes, place the candy canes in the crook of the cookie's arm and then cut the bullet vest to fit. Enjoy! #star wars #chewbacca #gingerbread #holiday #christmas #cookie
- Black Widow Candy Cane Cupcakes
Black Widow Candy Cane Cupcakes Candy cane fans will love this peppermint cupcake inspired by Black Widow! These red & white swirled peppermint cupcakes are frosted with a peppermint buttercream, dipped in crushed candy cane, and topped with a candy cane kiss! For an added bonus, these cupcakes are also drizzled with chocolate sauce! You can make your own chocolate ganache with some chocolate chips and heavy cream, or just use some chocolate syrup if you're in a time pinch! Servings: 24 Cupcakes Prep Time: 1.5 Hours Total Time: 4 Hours Ingredients Candy Cane Cupcakes 1 cup unsalted butter, room temperature 4 eggs, room temperature 1 cup whole milk, room temperature 1 + 3/4 cups cake flour 1 + 1/4 cups all-purpose flour 1 + 3/4 cups granulated sugar 2 + 1/2 teaspoons baking powder 1 teaspoon salt 2 teaspoons peppermint extract Red food coloring Vanilla Buttercream 1 cup unsalted butter, room temperature 4 cups powdered sugar 1 teaspoon peppermint extract 3 tablespoons heavy whipping cream 1 cup of crushed candy canes Red icing color Candy cane Hershey's Kisses Chocolate syrup Instructions Cupcakes: Preheat the oven to 350°F. Prepare cupcake tins with 24 liners. Set aside. Cupcakes: In a medium bowl, mix together cake flour, all-purpose flour, and baking powder. Set aside. Cupcakes: In a large bowl, beat unsalted butter with granulated sugar until smooth and creamy (3-5 minutes). Add 2 eggs and beat until just combined, then add remaining 2 eggs and do the same. Cupcakes: Add half of the dry ingredients to the wet ingredients and mix until just combined. Cupcakes: Add the milk, extracts, and salt, beating until just combined. Fold in the remaining flour mixture. Cupcakes: Divide half of the cupcake batter into a different bowl. Dye with red food coloring. Cupcakes: Fill the 24 liners about 1/2-3/4 of the way full with the cupcake batter, alternating between 1-2 tablespoons of white and then red batter. Don't overfill or the batter could spill over when baking. Bake for 20-25 minutes or until a toothpick inserted into the center of the cupcake comes out clean. Buttercream: In a large bowl, beat 1 cup of unsalted butter on high speed until smooth and creamy (2-3 minutes). Add 1 teaspoon of peppermint extract and 3 tablespoons of heavy whipping cream. Add 4 cups total of powdered sugar in increments. Assembly: Fill a bowl with 1 cup of crushed candy cane. Fill a piping bag with a large round tip with about 1/2 of the buttercream. Assembly: One cupcake at a time, pipe a swirl of white buttercream onto the top. Roll the buttercream in the bowl of candy cane, covering the sides and the top. Place the cupcakes in the freezer or fridge for 20-30 minutes to set. Assembly: Drizzle chocolate syrup in a circular pattern over the crushed candy cane along the edges so that the syrup falls down the side of the cupcake. Assembly: Using a small paintbrush, paint a line of red food coloring on opposite sides of an empty piping bag. Fill a piping bag prepped with a 1M tip with the remaining buttercream very carefully; you don't want the colors to smudge. Assembly: Pipe a dollop of the red striped buttercream onto the top of each cupcake. Assembly: Top with a Candy Cane Hershey's kiss. Enjoy! #cupcakes #marvel #black widow #peppermint #candy cane #christmas
- Harley Quinn Circus Cheesecake
Harley Quinn Circus Cheesecake Harley & Bruce are back with a festive twist on my circus animal cookie no-bake cheesecake recipe! This cheesecake has Christmas cookies in the base and chopped cookies sandwiched between layers of delicious white chocolate/vanilla cheesecake! It's a breeze to put together aside from the fondant work which takes some time. Other than that, though, this is a very simple and quick recipe to whip up and enjoy for the holidays! Servings: 1 9-inch cheesecake Prep Time: 4 Hours Total Time: 15 Hours Ingredients Animal Cookie Crust 2 + ¼ cups frosted animal cookies, crushed 6 tablespoons salted butter, melted Cheesecake Filling 3 tablespoons gelatin powder 6 tablespoons water, cold 24 ounces (3x8 oz blocks) cream cheese, room temperature 1 + ½ cups heavy whipping cream 2 teaspoons vanilla extract 2 cups white chocolate, melted 1 + 1/2 cups frosted animals cookies, chopped Cream Cheese Buttercream 1/2 cup unsalted butter, softened 8 oz cream cheese, softened 3 teaspoons vanilla extract 4 cups powdered sugar 3 tablespoons heavy whipping cream Red food coloring Green food coloring Red fondant Green fondant Christmas sprinkles Instructions Fondant: If possible, start the fondant prep work a day in advance or before you do anything with the remainder of the cheesecake so that the letters have time to harden. Roll out red and green fondant to about 1/8 of an inch and use letter cut-outs to cut out HARLEY QUINN (~7 of each color). Place in the fridge to chill and harden. Crust: Line a 9 inch springform pan with cooking spray and parchment paper. Crust: In a food processor (or using a Ziploc bag and a rolling pin), crush enough animal cookies to fill 2 + ¼ cups. Melt 6 tablespoons of salted butter in the microwave. Combine in a small bowl. Crust: Press the mixture into the bottom of the springform pan using a spoon. Chill in the freezer for at least 1 hour. Cheesecake: Add 3 tablespoons of gelatin powder and 6 tablespoons of cold water together in a small mixing bowl. Stir until well-combined; wait for 5 minutes. Cheesecake: In a large microwave safe bowl or using a double boiler, melt 2 cups of white chocolate chips. Allow time to slightly cool. Cheesecake: In a large bowl, add 3 8 ounce blocks of cream cheese, 1 + ½ cups of heavy whipping cream, and 2 teaspoons vanilla extract. Beat on high speed until well combined. Heat the gelatin in the microwave for 30 seconds and then add the gelatin and white chocolate to the mixture. Beat until well-combined. Cheesecake: Pour 1/2 of the cheesecake batter over the chilled crust. Layer with chopped animal cookies. Pour remaining 1/2 of the cheesecake batter. Fondant: On the top of the cheesecake, press in the fondant letters to spell out 'HARLEY QUINN' until the surface of the cheesecake is covered. Sprinkle with some red, green, and white sprinkles. Cheesecake: Place the cheesecake in the freezer to chill for at least 5 hours but preferably overnight. Buttercream: In a large bowl, beat together 1/2 cup of unsalted butter, 8 ounces of cream cheese, 3 tablespoons of heavy whipping cream, and 3 teaspoons of vanilla extract until smooth and creamy. Buttercream: Beat 4 cups of powdered sugar into the mixture. Buttercream: Divide the buttercream into three bowls (about 1/2 in one bowl and then 1/4 in the remaining two bowls). Dye the buttercream in the smaller bowls red and green. Fill three piping bags with the buttercream. Buttercream: Spread out a piece of plastic wrap onto the table. Pipe a thick line of white buttercream, a thin line of red buttercream, and then repeat. Fold the plastic wrap into a cylinder and then place inside a large piping bag. Repeat with the green buttercream. Buttercream: Pipe dollops of buttercream on top of the cheesecake (half with the green buttercream and half with the red). Sprinkle Christmas sprinkles on top of the buttercream. Enjoy! #dc #harley quinn #cheesecake #no bake #animal cookies #frozen
- Stranger Things Christmas Lights Cupcakes
Stranger Things Christmas Lights Cupcakes These Christmas lights decorations have taken a bit more of a sinister turn with the tribute to Stranger Things! But that doesn’t make them any less sweet! These chocolate cupcakes have Christmas Oreos hidden at the bottom and are topped with a traditional vanilla buttercream along with the candies. Bake these up and enjoy with a Stranger Things marathon! They’re an 11/10! Servings: 12-16 Cupcakes Prep Time: 1.5 Hours Total Time: 4 Hours Ingredients Cookies & Cream Cupcakes 1/2 cup unsalted butter, room temperature 2 egg whites 3/4 cup sour cream 1/4 cup milk 1 teaspoon vanilla extract 1 teaspoon baking powder 1/2 teaspoon baking soda 1/4 teaspoon salt 1 cup all-purpose flour 3/4 cup granulated sugar 1/3 cup cocoa powder 2 tablespoons melted chocolate 1 package of Oreos Vanilla Buttercream 1 cup unsalted butter, room temperature 4 cups powdered sugar 1 tablespoon vanilla extract 3 tablespoons heavy whipping cream Christmas lights sprinkles Black licorice laces Black fondant Instructions Cupcakes: Preheat the oven to 375°F. Prepare cupcake tins with 16 liners. Set aside. Cupcakes: In a medium bowl, mix together 1 cup all-purpose flour, 1/3 cup cocoa powder, 1 teaspoon baking powder, 1 teaspoon baking soda, and 1/4 teaspoon salt. Set aside. Cupcakes: In a large bowl, beat 1/2 cup of unsalted butter until smooth and creamy (2-3 minutes). Add 3/4 cup granulated sugar and beat until smooth and creamy (2-3 minutes). Add 2 egg whites and beat until white and fluffy (1-2 minutes). Add 1/4 cup milk, 3/4 cup sour cream, 1 teaspoon vanilla extract, and 1/4 cup milk. Melt 2 tablespoons of chocolate chips in the microwave in 20 second increments. Add to the batter. Beat until well-combined (2-3 minutes). Cupcakes: Add the dry ingredients to the wet ingredients and mix until just combined. Cupcakes: Put 10-14 Oreo cookies in a food processor (or put in a plastic bag and crumble with a rolling pin) until you have 3/4 cup of crushed Oreos. Don't worry about removing the cream from inside the Oreos before crumbling - we left ours as is! Fold the crushed Oreos into the batter. If you would like, add black food coloring to the batter. Cupcakes: In the bottom of each of the cupcake liners, put 1 Oreo. Put a spoonful of batter over the top of the Oreo. Be careful not to overfill. These cupcakes are easy to overfill because the Oreos take up so much space. Cupcakes: Bake for 5 minutes at 375°F. Lower the oven temperature to 350°F and bake for an additional 20-25 minutes. Allow to cool completely. Buttercream: In a large bowl, beat 1 cup of unsalted butter on high speed until smooth and creamy (2-3 minutes). Add 1 tablespoon of vanilla extract and 4 tablespoons of heavy whipping cream. Add 4 cups total of powdered sugar in increments. Assembly: Pipe a triple donut of buttercream over the top of each cooled cupcake. Place in the freezer for 10 minutes to help the buttercream keep its shape. Assembly: Carefully line up a black licorice lace along the grooves of the cupcake. Place Christmas lights along the licorice line, pressing just enough to get it to stick to the buttercream. Assembly: If you'd like the letters on the top of the cupcakes, spread out black fondant and use letter cut-outs for each letter you'd like. Place in the fridge for 1 hour to firm up, and then press onto the top of the cupcake. Enjoy! #cupcakes #netflix #stranger things #christmas #cookies and cream #oreo
- Peppermint Endgame Cheesecake
Peppermint Endgame Cheesecake This no bake cheesecake is inspired by the Time Travel suits from the best movie of all time, Avengers: Endgame! There are no infinity stones to be found inside this peppermint cheesecake, but definitely you won't have to hunt for peppermint and chocolate with this recipe. The Oreo cheesecake layer is sandwiched between two layers of cheesecake packed with several types of peppermints and chocolates, and it's all topped with a cream cheese buttercream! Servings: 1 9-inch cheesecake Prep Time: 4 Hours Total Time: 15 Hours Ingredients Oreo Crust 2 + ¼ cups Oreo cookies, crushed ¼ cup salted butter, melted Cheesecake Filling + Topping 3 tablespoons gelatin powder 6 tablespoons water, cold 24 ounces (3x8 oz blocks) cream cheese, room temperature 1 + ½ cups heavy whipping cream 2 teaspoons peppermint extract 1 teaspoon vanilla extract 2 cups white chocolate, melted 1 cup Oreo cookies, chopped 1 cup peppermint bark, chopped (frozen) 1 cup Andes peppermint chocolate 1 cup mini chocolate chips 1 cup crushed candy cane Cream Cheese Buttercream 1/2 cup unsalted butter, softened 8 oz cream cheese, softened 2 teaspoons peppermint extract 3 tablespoons heavy whipping cream 4 cups powdered sugar Instructions Crust: Line a 9 inch springform pan with cooking spray and parchment paper. Crust: In a food processor (or using a Ziploc bag and a rolling pin), crush enough Oreo cookies to fill 2 + ¼ cups. Melt ¼ cup of salted butter in the microwave. Combine in a small bowl. Crust: Press the mixture into the bottom of the springform pan using a spoon. Chill in the freezer for at least 1 hour. Cheesecake: Add 3 tablespoons of gelatin powder and 6 tablespoons of cold water together in a small mixing bowl. Stir until well-combined; wait for 5 minutes. Cheesecake: In a large microwave safe bowl or using a double boiler, melt 2 cups of white chocolate chips. Allow time to slightly cool. Cheesecake: In a large bowl, add 3 8 ounce blocks of cream cheese, 1 + ½ cups of heavy whipping cream, 1 teaspoon of vanilla extract, and 2 teaspoons of peppermint extract. Beat on high speed until well combined. Heat the gelatin in the microwave for 30 seconds and then add the gelatin and white chocolate to the mixture. Beat until well-combined. Cheesecake: Split the cheesecake batter into two bowls, 2/3 mixture in one bowl and 1/3 mixture in another bowl. Cheesecake: In a large bowl, mix together the peppermint bark, the Andes chocolates, mini chocolate chips, crushed cane, and a pinch of flour. Mix 1/2-2/3 of this mixture into the larger bowl of cheesecake batter. Fold in 1/2-2/3 cup of the chopped Oreo cookies into the smaller bowl of cheesecake batter. Cheesecake: Spread 1/2 of the larger cheesecake batter bowl over the chilled Oreo crust. Smooth the Oreo cheesecake batter over the top, and then spread the remainder of the cheesecake batter over that layer. Sprinkle the remaining Oreos and chocolate/peppermint mixture over the top of the cheesecake. Cheesecake: Chill for at least 5 hours or overnight (preferably). Remove the cheesecake from the springform pan. Buttercream: In a large bowl, beat together 1/2 cup of unsalted butter, 8 oz cream cheese, 2 teaspoons of peppermint extract, and 3 tablespoons of heavy cream until smooth and creamy. Buttercream: Beat 4 cups of powdered sugar into the mixture. Buttercream: Divide the buttercream into three bowls (about 1/2 in one bowl and then 1/4 in the remaining two bowls). Dye the buttercream in the smaller bowls red and black. Fill three piping bags with the buttercream. Buttercream: Spread out a piece of plastic wrap onto the table. Pipe a thick line of white buttercream, a thin line of red buttercream, a thick line of white buttercream, and a thin line of black buttercream. Repeat once. Fold the plastic wrap into a cylinder and then place inside a large piping bag. Buttercream: Pipe dollops of buttercream on top of the cheesecake. Enjoy! #avengers #thor #iron man #captain america #endgame #peppermint #oreo #candy cane #cheesecake #frozen #no bake
- Harlequin Christmas Cupcakes
Harlequin Christmas Cupcakes Starting December off with a very festive funfetti Christmas cupcake inspired by Harley Quinn! These funfetti cupcakes are filled and topped with Christmas sprinkles, feature a red & green swirled vanilla buttercream, and topped off with a Sugar Cookie Hershey's Kiss! I used about 10 of the cupcakes and 1/4 cup of the buttercream to make some funfetti cake balls that were absolutely amazing! Just grab some red and green candy melts, and you'll have everything else you need in the recipe below! Enjoy! Servings: 24 Cupcakes Prep Time: 1.5 Hours Total Time: 4 Hours Ingredients Funfetti Cupcakes 1 cup unsalted butter, room temperature 4 eggs, room temperature 1 cup whole milk, room temperature 1 + 3/4 cups cake flour 1 + 1/4 cups all-purpose flour 1 + 3/4 cups granulated sugar 2 + 1/2 teaspoons baking powder 1 teaspoon salt 2 teaspoons vanilla extract 2/3 cup Christmas sprinkles Vanilla Buttercream 1 cup unsalted butter, room temperature 4 cups powdered sugar 1 teaspoon vanilla extract 3 tablespoons heavy whipping cream 1 cup of Christmas sprinkles Red icing color Green icing color Sugar Cookie Hershey's Kisses Instructions Cupcakes: Preheat the oven to 350°F. Prepare cupcake tins with 24 liners. Set aside. Cupcakes: In a medium bowl, mix together cake flour, all-purpose flour, and baking powder. Set aside. Cupcakes: In a large bowl, beat unsalted butter with granulated sugar until smooth and creamy (3-5 minutes). Add 2 eggs and beat until just combined, then add remaining 2 eggs and do the same. Cupcakes: Add half of the dry ingredients to the wet ingredients and mix until just combined. Cupcakes: Add the milk, vanilla extract and salt, beating until just combined. Fold in the remaining flour mixture, and then the Christmas sprinkles. Cupcakes: Fill the 24 liners about 1/2-3/4 of the way full with the cupcake batter. Don't overfill or the batter could spill over when baking. Bake for 20-25 minutes or until a toothpick inserted into the center of the cupcake comes out clean. Buttercream: In a large bowl, beat 1 cup of unsalted butter on high speed until smooth and creamy (2-3 minutes). Add 1 tablespoon of vanilla extract and 4 tablespoons of heavy whipping cream. Add 4 cups total of powdered sugar in increments. Assembly: Fill a bowl with 1 cup of Christmas sprinkles. Fill a piping bag with a large round tip with about 1/2 of the buttercream. Assembly: One cupcake at a time, pipe a swirl of white buttercream onto the top. Roll the buttercream in the bowl of sprinkles, covering the sides and the top. Place the cupcakes in the freezer or fridge for 20-30 minutes to set. Assembly: Using a small paintbrush, paint a line of red food coloring on one side of an empty piping bag. On the opposite side, paint a line of green food coloring. Fill a piping bag prepped with a 1M tip with the remaining buttercream very carefully; you don't want the colors to smudge. Assembly: Pipe a dollop of the red and green striped buttercream onto the top of each cupcake. Assembly: Top with a Sugar Cookie Hershey's kiss. Enjoy! #cupcakes #dc #harley quinn #funfetti #vanilla #holiday #christmas #sprinkles #confetti
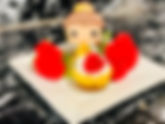
- Enchanted Rose Mini Eggnog Cheesecakes
Enchanted Rose Mini Eggnog Cheesecakes There’s no better way to start off the holiday season than with these mini cheesecakes inspired by Belle from Beauty and The Beast! These mini cheesecakes are eggnog flavored with a Biscoff cookie base. They’re topped with whipped cream, some sugar pearls, and of course an enchanted rose! As they’re mini cheesecakes, they are super simple to make with no water bath required. You can make homemade whipped cream to top if you’d like, or just go with the store-bought kind if you’re in a pinch! Enjoy! Servings: 12 Mini Cheesecakes Prep Time: 1 Hour Total Time: 4 Hours Ingredients Eggnog Cheesecakes 1 cup + 2 tablespoons Biscoff cookies, crushed 3 tablespoons salted butter, melted 8 ounces cream cheese, room temperature 1 cup salted butter, room temperature 1/4 cup + 1 tablespoon eggnog, room temperature 1 egg, room temperature 1 tablespoon all-purpose flour 1 + 1/4 cup granulated sugar 1/2 teaspoon vanilla extract 1/4 teaspoon nutmeg Yellow food coloring Garnish: Whipped Cream Garnish: Icing Decorations - Roses Garnish: Sugar pearls Instructions Prep: Preheat the oven to 300°F. Line a cupcake tin with 12 liners. Crust: In a food processor (or using a Ziploc bag and a rolling pin), crush enough cookies to fill 1 cup + 2 tablespoons. Melt 3 tablespoons of salted butter in the microwave. Combine in a small bowl. Crust: Press the mixture into the bottom of each of the cupcake liners (approximately 1 + 1/2 tablespoons per cup). Bake for 8 minutes and allow to cool. Cheesecake: Beat the cream cheese, butter, and sugar together until smooth (about 2 minutes). Add the vanilla, nutmeg, and flour. Beat until just combined. Add the eggnog and egg and beat until just combined. Add yellow food coloring until the desired hue is reached. Cheesecake: Spoon 2 tablespoons of cheesecake batter into each cup. Bake for 18 minutes. Cheesecake: Turn off the oven and allow the cheesecakes to sit in the oven for 5 minutes. Crack open the oven door and allow the cheesecakes to sit for another 5 minutes. Remove from the oven and allow to completely cool. Chill for 3 hours. Assembly: Place a dollop of whipped cream onto each cheesecake. Top with a rose and sugar pearls. Enjoy! #cheesecake #eggnog #disney #beauty & the beast #belle #bite size
- I Love You 3000 Tres Leches Cupcakes
I Love You 3000 Tres Leches Cupcakes These tres leches cupcakes take their inspiration from one of the most iconic quotes from the MCU, "I love you 3000." There are only 3 types of milk in this cupcake (you know, just shy of 3000), but you get the gist! These cupcakes have a cream cheese buttercream dusted with gold edible paint and topped with fondant Iron Man molds! Just a note - as these cupcakes are soaked in the 3 milks, I'd recommend using silicone cupcake liners rather than the paper ones or removing from paper liners prior to drizzling with the milk mixture. Servings: 12 Cupcakes Prep Time: 2 Hours Total Time: 12 Hours Ingredients Tres Leche Cupcakes 1/2 cup unsalted butter, room temperature 2 large eggs, room temperature 1/2 cup buttermilk, room temperature 1 + 1/4 cup all-purpose flour 3/4 cup granulated sugar 1 + 1/4 teaspoon baking powder 1/2 teaspoon salt 2 teaspoons vanilla extract Milk Mixture: 14 oz can sweetened condensed milk Milk Mixture: 12 oz can evaporated milk Milk Mixture: 1 cup heavy whipping cream Cream Cheese Buttercream 1/2 cup unsalted butter, room temperature 8 oz cream cheese, room temperature 2 tablespoons heavy whipping cream 3 teaspoons vanilla extract 4 cups powdered sugar Edible gold paint Decorations: Iron Man mold Decorations: Red fondant Decorations: White royal/cookie icing Instructions Fondant Molds: Roll out red fondant and cut into strips a little larger than the size of the mold you will be using. Press the fondant into the mold and fold over the edges to the center. Set aside for 1 hour. Fondant Molds: Carefully pull out the fondant from the molds using a toothpick or fondant sculpting tools to pry loose from the sides. Allow the fondant to dry (2-3 hours or overnight). Fondant Molds: Paint the eyes and the mask outline in white royal icing and allow to harden. Cover the mask part of the white royal icing with gold edible paint and allow to dry. Note: painting the mask base in yellow royal icing instead of white may help with blending. (I didn't think of this until after!) Buttercream: In a large bowl, beat together butter, cream cheese, heavy whipping cream, and vanilla extract until smooth and creamy. Buttercream: Beat 4 cups of powdered sugar into the mixture. Buttercream: Dye the buttercream a golden yellow. Buttercream: Prep a 13x9 pan with parchment or wax paper and pipe 12 dollops of buttercream tall enough to support the fondant mold. Place in the freezer for at least 2 hours. Set aside the remaining buttercream. Buttercream: Remove the buttercream from the freezer. Using gold edible paint, paint the buttercream until the buttercream is golden. Buttercream: Spread the remaining buttercream over the backs of the fondant molds and press to the piped dollops. Place back in the freezer. Cupcakes: Preheat oven to 350°F. Prepare cupcake tins with liners. Note: Silicone liners will work best for this recipe, given the milk mixture. Cupcakes: In a large bowl, whisk flour, baking powder, and salt. Set aside. Cupcakes: In a large bowl, beat together the butter and granulated sugar until fluffy (3-5 minutes). Add eggs and vanilla extract then beat until well-combined. Cupcakes: Add in 1/2 of the flour mixture and beat until well-incorporated. Add buttermilk. Beat until well-combined. Add in the remainder of the flour mixture. Cupcakes: Pour the batter into the cupcake liners; only fill 2/3 full or the batter will overflow. Bake the cupcakes for 20-23 minutes, or until a toothpick inserted into the center of the cupcake comes out clean. Allow the cupcakes to cool completely. Cupcakes: Using a small skewer, pierce multiple holes all over the surface of the cupcake base (but be careful not to pierce into the bottom of the cupcake). The more, the merrier! Place the cupcakes in the fridge while prepping the milk mixture. Cupcakes: In a large bowl, whisk together the sweetened condensed milk, evaporated milk, and heavy whipping cream. Using a small spoon, scoop the mixture over the top of the cooled cupcakes. You can also use a squeeze bottle for even better results. Cupcakes: Place the cupcakes in the fridge for 1 hour. Assembly: Top the cupcakes with the frozen buttercream. Allow to sit at room temperature for 20-30 minutes. Enjoy! #cupcakes #tres leches #cream cheese #marvel #iron man
- Dead Velvet Oreo Brownies
Dead Velvet Oreo Brownies These “dead velvet” brownies have five layers to satisfy even the most indulgent sweet tooth! There are two Oreo layers, a chocolate brownie layer, a red velvet brownie layer, topped with a cream cheese buttercream layer!! All of my favorites 😇 The red Oreo layer is made from the Christmas version of the Oreo to really bring home the red, black, and white theme of Deadpool! Of course, though, they can be substituted with the regular Oreo to make this recipe year-round! Servings: 16 Brownies Prep Time: 1 Hour Total Time: 3 Hours Ingredients Chocolate Brownies 1/2 cup + 2 tablespoons unsalted butter 4 oz semisweet chocolate, roughly chopped 1/4 cup + 2 tablespoons unsweetened dutch process cocoa powder, divided into 1/ cup + 2 tablespoons 1 cup granulated sugar 1/4 cup dark brown sugar 1 teaspoon vanilla extract 1 teaspoon kosher salt 3 large eggs 1/2 cup all-purpose flour Black food coloring 1 package of regular Oreos 1 package of Christmas Oreos Red Velvet Brownies 2 large eggs, room temperature 1/2 cup unsalted butter, melted 2 teaspoons vanilla extract 3/4 teaspoon white vinegar 1 cup granulated sugar 1/4 cup unsweetened cocoa powder 3/4 cup all-purpose flour 1/8 teaspoon salt Red food coloring Cream Cheese Buttercream Filling 1/2 cup unsalted butter, softened 8 oz cream cheese, softened 3 teaspoons vanilla extract 4 cups powdered sugar 1/4 teaspoon salt Instructions Prep: Line a 13x9 pan with parchment paper and set aside. Pre-heat the oven to 350°F. Brownies: In a large bowl, mix together 1/2 cup of flour and 1/4 cup of unsweetened dutch process cocoa powder. Set aside. Brownies: In a medium heatproof bowl, combine the 4 oz chopped bittersweet chocolate and 1/8 cup of unsweetened dutch process cocoa powder. Put the unsalted butter in a small saucepan over medium heat. Cook for 5 minutes until the butter comes to a simmer. Pour the hot butter over the chocolate mixture and allow it to sit for 2 minutes. Beat until the chocolate mixture is completely smooth and melted. Brownies: In a large bowl, add granulated sugar, brown sugar, vanilla extract, and salt. Add eggs. Beat until well-combined. Beat on high speed until light and fluffy, about 10 minutes. Brownies: Slowly combine the chocolate mixture and the butter mixture. Blend until smooth. Gently fold in the flour mixture until just combined. Add black food coloring until the desired color is reached. Set aside. Red Velvet Brownies: In a large bowl, beat together sugar, salt, vanilla extract, and eggs until smooth and creamy (1-2 minutes). Beat in the white vinegar. Red Velvet Brownies: Melt 1/2 cup of unsalted butter in the microwave for 30 seconds until melted. Beat the melted butter into the large bowl. Red Velvet Brownies: Fold in the cocoa powder and then fold in the flour (making sure the batter is well-combined in between additions). Red Velvet Brownies: Add red food coloring to the mixture until the desired hue is reached. Brownies: Line the bottom of the 13x9 pan with the regular Oreos. Pour the chocolate brownies over the Oreo layer. Top the brownie layer with the Christmas (red) Oreos. Pour the red velvet brownies over that Oreo layer. Brownies: Bake for about 45-55 minutes and allow to cool. Buttercream: In a large bowl, beat together 1/2 cup of unsalted butter, 8 ounces cream cheese, salt, and 3 teaspoons of vanilla extract until smooth and creamy. Buttercream: Beat 4 cups of powdered sugar into the mixture. Buttercream: Spread the buttercream in a smooth layer over the brownies. Assembly: Roughly chop the remaining Oreos and then sprinkle over the buttercream. Enjoy! #deadpool #red velvet #brownies #oreo #oreos #cream cheese #chocolate
- Light Versus Dark Side Chocolate Cake
Light Versus Dark Side Chocolate Cake Pick between the light side and the dark side with this two-tone Star Wars cake! Would you go with the white chocolate or dark chocolate slice?! No matter what you go with, you’ll get your fair share of delicious vanilla buttercream and galaxy mirror glaze topping! Enjoy with the latest episodes of The Mandalorian!! Servings: 1 3-Layer 8-in cake Prep Time: 4 Hours Total Time: 8 Hours Ingredients White Chocolate Cake 1 + 1/2 cup whole milk, room temperature 3/4 cup unsalted butter, room temperature 3 eggs, room temperature 5 ounces white chocolate, chopped 2 + 1/2 cups all-purpose flour 1 + 1/4 cups granulated sugar 1 teaspoon vanilla extract 2 + 1/2 teaspoon baking powder 1/2 teaspoon salt Dark Chocolate Cake 1 + 1/2 cup whole milk, room temperature 3/4 cup unsalted butter, room temperature 3 eggs, room temperature 5 ounces dark chocolate, chopped 2 + 1/4 cups all-purpose flour 1/4 cup dark cocoa powder 1 + 1/4 cups granulated sugar 1 teaspoon vanilla extract 2 + 1/2 teaspoon baking powder 1/2 teaspoon salt Black food coloring Vanilla Buttercream 3 cups salted butter, room temperature 9 Tablespoons heavy cream, room temperature 3 teaspoon vanilla extract 12 cups powdered sugar Galaxy Mirror Glaze 1 + 1/4 cup water + 8 cups of water, cold 15 ounce can of sweetened condensed milk 26 ounces of white chocolate, chopped 15 sheets gelatin 1 + 1/2 cup sugar Black, navy blue, light blue, purple, pink, white food coloring Instructions Cakes: Preheat oven to 350°F. Prep 3 8-inch baking rounds with parchment paper. White Chocolate Cake: In a medium sized microwave safe bowl, melt together the milk and white chocolate. Allow to cool to room temperature while the other ingredients are prepared. White Chocolate Cake: In another bowl, whisk together the flour, baking powder, and salt. Divide batter into 3 and set aside. White Chocolate Cake: In a large bowl, beat the butter and sugar together until creamy and fluffy (3-4 minutes). Add the eggs one at a time, beating well in between additions. Add the vanilla and beat until combined. White Chocolate Cake: Alternate additions of the flour mixture and milk mixture in 3 incremental sessions, beating well in between each addition. Set batter aside. Dark Chocolate Cake: Repeat steps 1-5, replacing the white chocolate with dark chocolate and 1/4 cup of the flour with 1/4 cup of dark cocoa powder. Dye the mixture with black food coloring. Cakes: Place a towel underneath one side of one of the cake pans. Pour 1/3 of the white chocolate cake batter (about 2 cups) into the side of the pan not propped up by the towel. Swiftly remove the towel and pour the dark chocolate cake batter into the other half of the pan. Repeat for the other 2 cake pans. Cakes: Bake for 45 minutes or until a toothpick entered into the center of each side of the cakes comes out clean. Allow to cool. Buttercream: In a large bowl, beat 1 cup of salted butter until creamy and smooth. Beat in 3 tablespoons of heavy cream, and 1 teaspoon of vanilla. Beat in 4 cups of powdered sugar. Divide into two. Dye one bowl red and one bowl light blue. Buttercream: On the dark chocolate side of the cake, fill in the layers with the red buttercream. On the white chocolate side of the cake, fill in the layers with the blue buttercream. Place in the freezer for at least 1 hour. Buttercream: In a large bowl, beat 2 cups of salted butter until creamy and smooth. Beat in 6 tablespoons of heavy cream, and 2 teaspoons of vanilla. Beat in 8 cups of powdered sugar. Dye black. Buttercream: Apply a crumb coat of the black buttercream to the exterior of the cake. Freeze for at least 1 hour. Then apply another layer of buttercream to the exterior of the cake and freeze for at least 1 hour. Mirror Glaze: In a large saucepan, boil 1 + 1/4 cups of water, 1 + 1/2 cup sugar, and 1 can of condensed milk for 1 minute. Mirror Glaze: Chop 26 ounces of white chocolate and place in a large bowl. Set aside. Mirror Glaze: Fill a large bowl with 8 cups of cold water. Place the gelatin sheets in the cold water and allow to bloom. Wring the gelatin sheets of excess water and then mix into the sugar mixture. Mirror Glaze: Pour the mixture over the white chocolate and allow the chocolate to soften by leaving it for 2-3 minutes. Mirror Glaze: Blend the chocolate and the liquid using a blender until smooth. Pour the glaze through a sieve to ensure there are no bubbles. Mirror Glaze: Separate the glaze into five bowls, with one medium sized bowl and four smaller bowls. Color the medium sized bowl with black and navy food coloring. Dye the remaining bowls navy blue, light blue, purple, and pink. Mirror Glaze: Place the cake on a stand over a sheet tray. Mirror Glaze: Make sure each bowl is 90-96°F. If necessary, microwave. Pour all of the colored glazes into the medium sized bowl with the black and navy food coloring. Mirror Glaze: Pour the mirror glaze over the cake. Mirror Glaze: Dip a paintbrush into the white food coloring and fling it onto the cake to create a star effect. Enjoy! #cake #chocolate #vanilla #galaxy #star wars #yoda #the child #white chocolate #dark chocolate
- Michael's Chocolate Espresso Mug Cake
Michael's Chocolate Espresso Mug Cake This chocolate mug cake takes less than 5 minutes to prepare and just a little more than a minute in the microwave to cook. If you need a mid-day pick-me-up, then you can trade in your second (or third) cup of coffee with this chocolate espresso mug cake! It's best served in a patented Michael Scott "World's Best Boss" mug, but your favorite mug will work too in a pinch! Servings: 1 mug cake Prep Time: <5 minutes Total Time: <5 minutes Ingredients 1/4 cup + 1 tablespoon milk, room temperature 1/4 cup all purpose flour 2 tablespoons unsweetened cocoa powder 2 tablespoons sugar 2 tablespoons mini chocolate chips 2 tablespoons vegetable oil 1/2 tablespoon espresso powder 1/4 teaspoon baking powder Pinch of salt Instructions In a medium sized bowl, whisk together the flour, cocoa powder, sugar, espresso powder, and baking powder. Set aside. Whisk in the vegetable oil and milk until the batter is smooth. Pour 1/2 the batter into a microwave-safe coffee mug. Add 3/4 of the mini chocolate chips in the center of the mug. Add the remaining 1/2 of the batter. Top with the remaining 1/4 mini chocolate chips. Place the coffee mug on top of a paper towel into the microwave. Microwave for 70 seconds. Allow to cool and then enjoy! Best served with some ice cream! #cake #mug cake #chocolate #espresso #the office #michael scott
- Pumpkin King Pie
Pumpkin King Pie Thanksgiving may still be a couple of weeks away, but give this recipe a try if you want to perfect your pumpkin pie before the holiday! It's inspired by the Pumpkin King himself, Jack Skellington, with the crimped edges meant to resemble his crown! You even might be able to snag some discounted pumpkin candy corn at the store still! I took a shortcut in the video and used 2 store bought pie crusts rolled together, but I've included the recipe for a delicious pie crust if you'd like to start from scratch as well. Check out my Captain America Triple Berry Pie video for a demonstration on how to prepare! Servings: 1 Pie Prep Time: 1 Hour Total Time: 3 Hours Ingredients Pie Crust 2 cups all-purpose flour 10 tablespoons unsalted butter, chilled 2 large egg yolks 4 tablespoons ice water Pinch of kosher salt Egg Wash: 1 egg + 1 tablespoon heavy cream Pumpkin Pie Filling 3 large eggs, room temperature 1 cup heavy cream 1/2 cup whole milk 15 oz pumpkin puree 3/4 cup brown sugar 1/2 teaspoon ground cinnamon 1/4 teaspoon ground ginger 1/8 teaspoon ground cloves 1/2 teaspoon ground nutmeg 1/2 teaspoon salt Vanilla Buttercream 1 cup unsalted butter, room temperature 2 tablespoons heavy cream 4 cups powdered sugar 1 teaspoon vanilla extract 1/4 teaspoon salt Halloween sprinkles Pumpkin candy corn pieces Instructions Pie Crust: Sift together the flour and salt. Pie Crust: Incorporate the chilled butter into the flour using a pastry cutter or pinching the flour and butter together with the tips of your fingers. Make sure no large lumps remain. Pie Crust: Mix together the ice water and the egg yolks using a fork. Slowly incorporate the mixture into the flour. If the dough starts to get too moist, don't use all of the egg and water mixture. You just want the dough to be moist enough where it will stay together when you squeeze a ball of dough between your palms. Don't add any additional water/eggs after that point. Pie Crust: Dump the dough onto a floured surface. Knead the dough until it becomes a cohesive disk. Make sure there aren't any cracks or any pockets of flour. Wrap the disk in plastic wrap and chill for one hour. Pie Crust: After the dough has been chilled, flour a work surface and unwrap the dough onto it. Use a rolling pin to flatten out the dough by pressing firmly on it in multiple places. Then begin to roll out your dough. If there are any cracks, smush them together and roll out until smooth. Roll until the dough is about 1/4 inch thick. Roll the dough onto the rolling pin, and then roll over a glass pie plate. Fold over the excess dough and then pinch with your thumbs and index finger to make the crust. Set in the freezer to firm up for 10 minutes. Pie Crust: Preheat the oven to 425˚F. Pie Crust: Cut out a round piece of parchment paper and crumple it up. Press it into the pie pan and fill with chickpeas or baking beans. Bake the crust for 10-12 minutes. Remove from the oven, remove the beans and parchment paper, and prick the crust with a fork all oven. Bake for another 5-10 minutes. Pie Filling: Reduce the oven temperature to 350 degrees. Pie Filling: In a saucepan, combine the pumpkin puree, brown sugar, cinnamon, ginger, nutmeg, and salt. Stir over medium-low heat until the mixture just starts to bubble when left alone. Remove from heat and transfer to a large heat-proof bowl. Pie Filling: In a microwave safe bowl, combine the milk and cream. Microwave for about 90 seconds. Pie Filling: In a large bowl, whisk together the three eggs. Slowly incorporate the warm milk and cream mixture. Pie Filling: Add the egg and cream mixture to the pumpkin mixture and whisk until smooth. Pie Crust: Beat together 1 egg and a tablespoon of cream and brush over the crust (including the bottom of the pie shell). Wrap the edges of the pie with foil or a pie crust shield. Pie Filling: Pour the filling into the pie shell. Pie Filling: Bake the pie for 45-55 minutes or until the pie is set. Allow to cool on a wire rack for 2 hours. Buttercream: In a large bowl, beat butter until smooth and creamy. Add powdered sugar, cream, salt, and vanilla. Beat until well-combined and fill a piping bag with the buttercream. Buttercream: Pipe buttercream dollops on the interior edges of the pie and top with candy corn pumpkins and sprinkles. Enjoy! #pie #pumpkin pie #nightmare before christmas #jack skellington #pumpkin